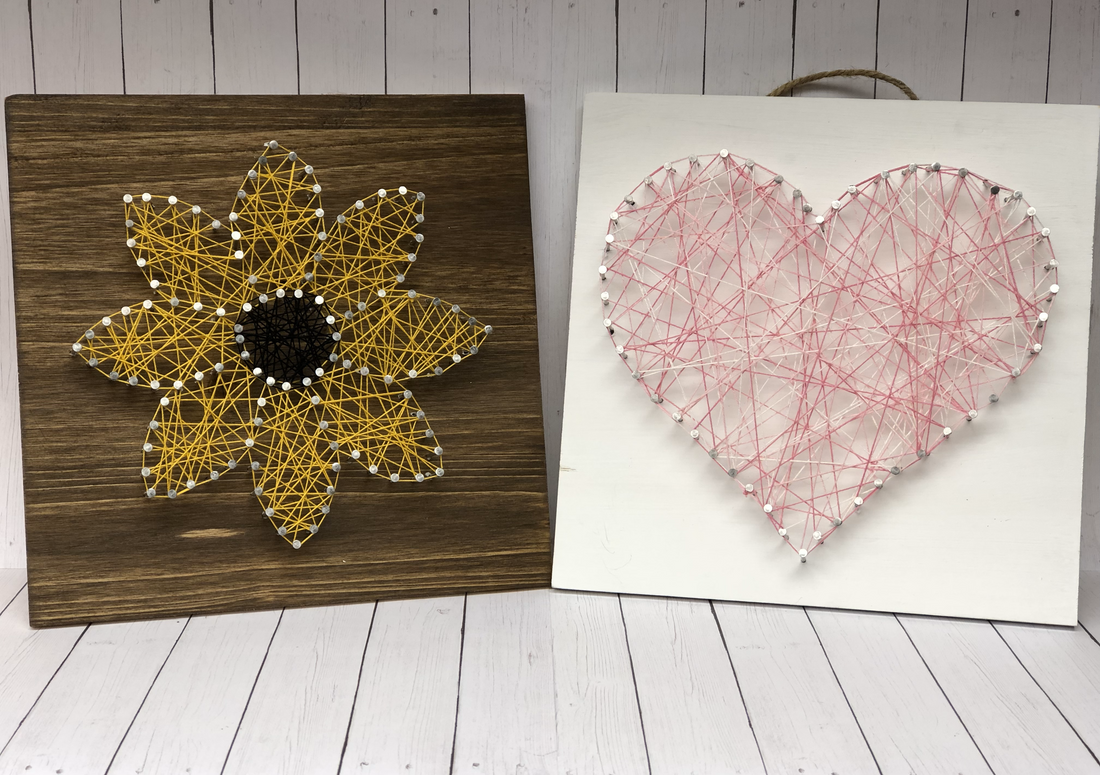
String Art for Kids
My boys were so proud of their string art that they asked me to hang them up in their room right away.
This project does require a bit of patience. My 5 year old was able to do it in a couple sittings with my help, but my almost 4 year old lost interest pretty quick. I recommend doing a very simple picture if you do this with younger kids, such as a heart or star.
Materials needed:
Wood Board
Nails
Template of your design
String - you can use yarn or string. Our favorite to use is the crochet thread size 10.
Light weight hammer - our boys had a tough time with our heavy hammer and preferred the lighter one.
Step 1
Print your template out to the size you want it to be and tape it to your piece of wood.
Step 2 - Hammer

Start hammering nails along the image. My boys had an easier time with the templates I created that included dots that showed them where to hammer each nail. Also, be sure to have a scrap piece of wood under your art piece to save your table. Learn from my mistakes! They hammered a little too far with some of the nails and my table shows it!
Step 3 - Add String

Time to add the string! First, you will want to double knot the string onto any nail of your choice. Then start criss-crossing and wrapping the string around nails to hold it tight. There is no right or wrong way to do this. You can follow the nails one by one for a uniform look, but we prefer to randomly wrap back and forth around the image. Remind your kiddos to stay inside the nails just like they would color inside the lines. It helps to first run your string around the outline of your image. To end your string, pick a nail to double knot it on. I like to add super glue to my knots just for added reinforcement.
If you want to do multiple colors, just start a new string with a new double knot.

He is so proud of his finished star.